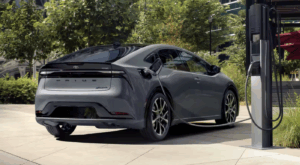
A Tesla Wall Connector is a convenient and efficient way to charge your Tesla vehicle at home. However, like any electronic device, it can occasionally experience issues and require troubleshooting. Knowing how to reset your Tesla wall charger can often resolve these problems quickly and get you back to charging without delay. This comprehensive guide covers common problems you might encounter with your Tesla Wall Connector, provides step-by-step instructions on how to perform various resets, and offers troubleshooting tips to help you diagnose and fix the issue.
Understanding Your Tesla Wall Charger
Before diving into troubleshooting and resets, it’s essential to understand the basics of your Tesla Wall Connector. The Wall Connector is more than just a charging cable; it’s a sophisticated piece of technology that communicates with your vehicle and manages the charging process. It monitors factors like the vehicle’s state of charge, available power, and temperature to ensure safe and optimal charging.
The Gen 3 Wall Connector allows you to connect up to four Wall Connectors to a single circuit breaker, enabling load sharing for multiple vehicles. This intelligent power management system means you don’t need to upgrade your home’s electrical system if you add more Teslas to your household.
Common Issues Requiring a Tesla Wall Charger Reset
Several problems might indicate the need for a reset. These include:
Charger not initiating charging: Your vehicle might not start charging when plugged into the Wall Connector. This can manifest as no lights on the connector, a red or amber light, or an error message on your car’s touchscreen.
Slow charging: The charging speed might be significantly slower than expected. This could be due to connectivity issues, a faulty connector, or problems with your vehicle’s charging system.
Interrupted charging: The charging process might stop unexpectedly before reaching completion. This could be caused by power fluctuations, overheating, or communication errors between the charger and the vehicle.
Error messages: The Tesla touchscreen in your vehicle might display error messages related to charging, such as “Charging Fault,” “Charge Port Door Open,” or other related messages.
Wall Connector not responding: The connector itself might not be responsive to touch or button presses. This could indicate a firmware issue or a hardware problem.
How to Reset a Tesla Wall Charger: Step-by-Step Guide
Several reset options are available, ranging from simple power cycles to more advanced network resets. Here’s a step-by-step guide for each:
1. Power Cycling the Tesla Wall Connector
This is the simplest form of reset and often resolves minor glitches.
1. Turn off the circuit breaker: Locate the circuit breaker dedicated to your Wall Connector and switch it off. This completely cuts power to the unit.
2. Wait for 5 minutes: Allow sufficient time for the charger’s internal components to discharge.
3. Turn the circuit breaker back on: Restore power to the Wall Connector.
4. Test the charger: Plug in your vehicle and check if it begins charging normally.
2. Rebooting the Tesla Wall Connector (Gen 3)
The Gen 3 Wall Connector has a built-in reboot function that can be accessed without turning off the breaker.
1. Press and hold the button on the connector: Locate the small button on the side or bottom of the unit (consult your manual if unsure). Press and hold this button for about 10 seconds.
2. Observe the LEDs: The LEDs should flash in a specific sequence indicating a reboot. Refer to the user manual for the exact sequence for your specific model.
3. Test the charger: Once the reboot is complete, try charging your vehicle.
3. Factory Resetting the Tesla Wall Connector
This method is more drastic and should only be used if other resets fail. It will erase all saved settings, including Wi-Fi credentials.
For Gen 2 and earlier: A factory reset usually requires contacting Tesla support or a certified electrician. There’s no user-accessible button or procedure.
For Gen 3:
1. Access the Wall Connector’s configuration page: Connect to your Wall Connector’s Wi-Fi network. Open a web browser and navigate to the IP address displayed on the Wi-Fi list (usually 192.168.92.1).
2. Navigate to the Factory Reset option: The location of this option may vary based on firmware version. It’s usually located under advanced settings or maintenance.
3. Confirm the reset: Follow the on-screen prompts to confirm the factory reset. The connector will reboot and revert to default settings.
4. Reconfigure the Wall Connector: You’ll need to reconnect the charger to your Wi-Fi network and reconfigure any custom settings.
Troubleshooting Tips for Tesla Wall Charger Problems
If resets don’t resolve the issue, consider these troubleshooting steps:
Check the charging cable: Inspect the cable for any visible damage, kinks, or loose connections. Try a different cable if you have one.
Inspect the vehicle’s charge port: Make sure the charge port is clean and free of obstructions. Check for any bent or damaged pins.
Verify power supply: Use a voltage meter to ensure the circuit breaker supplying power to the Wall Connector is delivering the correct voltage.
Check for software updates: Ensure your Tesla vehicle has the latest software updates installed. Outdated software can sometimes cause communication issues with the charger.
Contact Tesla Support: If you’ve exhausted all troubleshooting options, contact Tesla Support for further assistance. They can provide expert advice and diagnose more complex problems.
Preventive Maintenance for Your Tesla Wall Charger
While problems can occur, you can minimize them with proactive measures:
Regularly inspect the charger and cable: Look for signs of wear and tear, damage, or loose connections.
Keep the charger clean: Dust and debris can accumulate on the connector and potentially cause issues. Wipe it down periodically with a clean, dry cloth.
Ensure proper ventilation: Avoid installing the charger in enclosed spaces with limited airflow. Overheating can affect performance and potentially damage the unit.
Stay updated: Keep your Wall Connector’s firmware up-to-date. New firmware often includes bug fixes and performance improvements.
How to Reset the Tesla Mobile Connector
While this article primarily focuses on the Wall Connector, it’s worth noting that the Mobile Connector (the portable charger that comes with your Tesla) can also experience issues. If your Mobile Connector isn’t working correctly, you can try resetting it by unplugging it from both the power source and the vehicle, waiting a few minutes, and then plugging it back in. If the problem persists, contact Tesla support.
By understanding the different reset options and following these troubleshooting tips, you can often quickly resolve issues with your Tesla Wall Connector and keep your electric vehicle charged and ready to go. Remember that safety is paramount when dealing with electrical equipment. If you’re unsure about any procedure, consult a qualified electrician or contact Tesla


